Posts

Showing posts from 2021

Mechanical 7-segment Clock

Image
I saw this design on Thingiverse a few weeks ago.  I believe it was also featured in Make Magazine's blog.   Mechanical 7-segment Display, simple and smooth It's such a cool design that I had to make a clock out of it.  Note that the designer, Shinsaku Hiura , also has a full clock made from another of his designs.  I printed out 4 copies of the design using Hatchbox and Overture PLA.  Instead of painting just the faces of the moving arms I chose to print the entire part in white.  The movement is controlled by 4x 9-gram servos .  I had a leftover  Arduino Nano  to control the system.  The time is read from a  DS3231 real-time clock module  and a momentary pushbutton switch is used to switch between the clock and the date.  The switch triggers an interrupt in the code and makes the clock change the display to the date (MM / DD) format for 5 seconds before reverting back to the time in 24-hour format.  The clock is powered by a 5V USB charger.  Note that the servo power comes d
V-22 Osprey Project - Swashplate Repair

Image
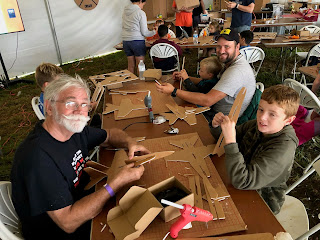
It's been a while since my last post.  In July my father, my son, and I traveled to Malvern, OH, for the annual Flite Fest RC festival hosted by Flite Test.  I took the Osprey with me to show off with the hopes of a demonstration flight, but it was not to be. I noticed prior to leaving for Ohio that one of the ball links on the left swashplate had stripped out and was loose.  I attempted to glue it back in with CA glue as an extreme thread locker, but it came loose during the 1500 mile trip.  At the festival I tried to glue it again with some epoxy, but it came loose again in handling at the festival.  Without any additional supplies on hand this meant that any demonstration flights were cancelled. When I got home I was able to repair the swashplate and ball link by drilling out the ball link itself and threading it with a 2-56 thread.  The original threads were 2mm and 2-56 is just slightly larger at 2.18mm.  I also drilled and threaded the swashplate for 2-56.  I used a short sec

dRehmFlight VTOL F-35 Review

Image
 The gentleman who developed the dRehmFlight VTOL flight controller (Nicholas Rehm) that I'm using in the V-22 Osprey project has published plans and 3D printed parts for an F-35 VTOL airplane.  I decided that it looked like a great distraction that could be done quickly.  I already had most of the electronics on hand including motors, ESCs, power distribution board, servos, and IMU board for the dRehmFlight VTOL flight controller.  I ordered more Teensy 4.0 boards and some 4S batteries and started cutting out the foam board according to the plans. The plane went together easily and the first flights went well.  My only complaint was that with the aileron hinge on top of the wing did not allow for enough down deflection to make the airplane hover in a level attitude.  I recut the ailerons and printed new motor mounts and adjusted those on the plane where the hinge is on the bottom.  I'm now about to get 70-80 degrees of down deflection and it hovers nice and level. I took a vid

V-22 Osprey Project - Tuning and Setup

ESC SETUP I used two Castle Creations Talon 60 ESCs for the V-22 Osprey.  These ESCs are high-quality with an electronic governer designed for RC helicopters.  Other ESCs with this feature are recommended.  Using the CastleLink software and USB dongle, I set the following RPM parameters: Throttle Setting 2-blade 3-blade 20% 2600 2000 70% 2600 2200 100% 2800 2400 As with any standard airplane or heli it's important to calibrate the ESC endpoints as well. TILT SERVO SETUP The HiTec D85MG servos are digital high-torque metal-gear servos that are programmable.  Using the HiTec programmer, I set the 1000us endpoint to the forward flight (0 degree) position and the 2000us endpoint to the hover (90 degree) position, with the 1500us center point in the middle (45 degrees).  The programming of the servo is a bit challenging, as the endpoints set in the programmer coordinate roughly to 900us and 2

V-22 Osprey Project - Bill of Materials

 At some point, I'm sure someone will ask me what all it took and how much it cost to build my version of the V-22 Osprey.  I sat down with a pile of Amazon receipts and compiled this BOM.  I believe I've captured all the component costs, but there will be some fudge factor.  For instance, I purchased the donor helicopters several years ago at a swap meet for $100 each, and I don't believe these are available any longer.  The KDS helicopter was, as far as I can tell, a clone of the popular Align Trex 450.  Similar clones still exist and parts are generally plentiful.  To date, this has cost me about half of what I could have purchased from Rotormast, so that's a plus. V-22 Bill of Materials

V-22 Osprey Project - Transition Flights and Crash

Image
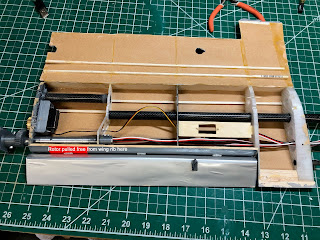
I took the Osprey out to my club field to start testing the transition into forward flight. It certainly got the attention of my fellow club members who were on site! The first two flights went off without a hitch. I was able to successfully transition the rotors to 45 degrees. I need to tune some additional parameters as the controls became very mushy and non-responsive. I think the rotor controls were phasing out before it had enough airspeed to make the flying surfaces functional. On my third flight disaster struck! I had been flying around just fine, but as I transitioned back to hover for landing it suddenly lost control and started pirouetting to the ground. I hit the throttle hold at tree level and it impacted the ground belly first. At the scene of the crash, I could see that the aluminum tube supporting the right rotor had pulled out of the wing enough for the rotor to flip 180 degrees to the left. I suspect that was the cause of the crash. The left wing broke the carbon

V-22 Osprey Project - Selecting the right battery

Image
Recently, I've been able to successfully hover the V-22 around the yard and start to tune some of the control parameters.  However, each of these flights is not very long and it has me concerned about battery selection and flight times.  The stock 450-sized helicopters recommend a 3S 2200mAh Lipo battery for an estimated flight time of 6 mins.  I started testing with two of these in parallel to make a 3S 4400mAh source for the Osprey. There's no beating around the bush, this machine is heavy.  Weighing in at 2lbs, 9.75oz (1186g) without batteries, it's a beast.  I've tried to be conscious of weight throughout the build, but with so much structure required for rigidity, it's hard to skimp out on materials knowing that any failure would be catastrophic. So what's the right mix of battery size to maximize flight time?  I had on-hand pairs of 3S 2200mAh, 4S 2200 mAh, and 4S 3000mAh.  To round out the selection, I ordered a pair of 3S 3300mAh batteries for testing.